 Piotr Pasich

Part I – Setting up environment with Docker
I have spent a lot of time watching presentations about automated deployment with Ansible, Capifony, Capistrano or making consistent environments with Vagrant or VirtualBox, but all of those presentations did not tought me how to build environment from scratch, to achieve complete continuous delivery system. And that’s why I decided to create a series of tutorials in which we will configure a virtual machine, join the configuration to the project, automatically deploy and connect everything together with a continuous delivery tool.
Let’s start with a simple Symfony application that contains only one entity. Please find the code at github repository – Codeship as continuous delivery system.
Docker
Docker is a new platform purposed for moving, deploying and building applications with full-stacked environment. It allows you to pack an application with all of its dependencies into a standardized unit for software development – the containers. This helps with maintaining a consistent development, QA, preview and production environments. You can always be sure that there is no difference between your local instance, QA and production servers.
Installation
The heart of the Docker is a shell command which is installed by the following line:
|
1
|
wget -qO- https://get.docker.com/ | sh
|
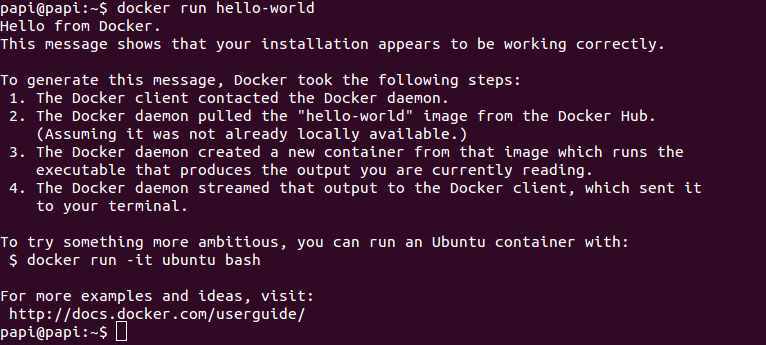
This will download a script and run installation on your machine. There’s a simple way to check whether the Docker works properly on our computer – we can run a test container with “Hello World” message. To make this happen, we need to execute the very first command in Docker – `docker run hello_world`. The container will be built and run and the Docker will welcome you.
The docker run is one of the most useful commands. There are more options available and I will try to explain and show how to use in practice most of them, e.g. start, stop, ps, pull and exec.
How to setup your first container for website?
The Hello World container makes a smile on your face and that’s natural – something is working fine. But now is the time for a real work – setting up all containers for the application. Most of the platforms I used to work with are based on PHP with Apache or Nginx web server and at least one database, so I decide to exercise Apache with MySQL in this tutorial.
If you are a Vagrant or VirtualBox user, then you probably got used to install both services inside one virtual machine. With Docker you can pick components and compose your entire environment from them. It’s just like building a fortress with LEGO.
The best place to collect your bricks is an official Docker website with hub registry – https://registry.hub.docker.com/. Of course, you can always build everything from scratch, but I recommend to start with searching a container which fits your needs, because building own container might take a lot of time at the beginning. The best thing about Docker registry is that you can always find a matching container.
Let’s see how many Symfony containers we can find.

Well, over 90 and still counting. In the right column we can see two important indicators – stars and number of downloads.The more popular, the better? Not always, but that’s a nice start. Please select the phpmentors/symfony-app for the purpose of this course. As the authors instruct in the Readme, to run the container we need to execute:
|
1
|
docker run –name container_name -v /path/to/symfony-app:/var/app -p 8080:80 –link mysql56:mysql -d phpmentors/symfony-app:php55
|
That should initiate a container with Apache server called symfony_app (–name parameter) and map /path/to/symfony-app folder on your local machine to /var/app folder inside the container. The -p parameter is responsible for port mapping. The application will be exposed on http://localhost:8080 address.
The container doesn’t include the database. It requires linking another container with MySQL. To achieve that please use –link parameter which takes as arguments container’s name (mysql56 before colon) and the service name that will be used for connection (after the colon). Inside Docker container, the host of MySQL is called… ‘mysql’. We should put that in the application’s configuration.
I have mentioned that this command should start the container, but it wouldn’t. Previously, we need to setup the linked database container, because it doesn’t exist yet. Let’s run the MySQL.
|
1
|
docker run –name mysql56 -e MYSQL_ROOT_PASSWORD=root -d mysql:5.6
|
There are two more parameters in this command: -d is an abbreviation from daemon mode and will run the Docker in the background. And Docker repository name from Docker hub registry.
Now, we’re ready to run the Symfony container with previous command. To check that all containers are running we can use docker ps command which will basically list all running containers.

If you want to list all containers, not only the currently running, you can use -a (all) option.
If you want to stop the containers, you can use the command docker stop container_name.
If you want to run them again, just execute docker start container_name.
Docker compose
Starting two containers separately seems to be really annoying. Fortunate for us, the Docker has already released a compose module which allows to build packages. More information can be found at https://docs.docker.com/compose/ .
To install docker-compose on the local machine we need to execute two commands (curl and chmod) that will create a new tool in the system – docker-compose.
|
1
2 |
curl -L https://github.com/docker/compose/releases/download/1.2.0/docker-compose-`uname -s`-`uname -m` > /usr/local/bin/docker-compose
chmod +x /usr/local/bin/docker-compose |
We will configure the two containers – with Symfony and Mysql – so that they can be run together from open file. Please create a docker-compose.yml file in the root folder of the application and define all variables.
|
1
2 3 4 5 6 7 8 9 10 11 12 |
symfony:
image: phpmentors/symfony-app:php55 links: – mysql ports: – “8000:80″ volumes: – .:/var/app mysql: image: mysql:5.6 environment: – MYSQL_ROOT_PASSWORD=pass |
Afterwards, execute docker-composer up which will build two containers automatically. But remember, next time there is no need to run this command and build those containers from scratch – use docker-composer start command instead (it is so much faster!).
Customization (Dockerfile)
What if we would like to customize the container? For example, install additional plugins or extensions? Docker uses a file purposed for that – the Dockerfile which should be placed in a root of our application. The basic version will have only one configuration option – the source container with exposed http port:
|
1
2 3 4 |
#Dockerfile
FROM: phpmentors/symfony-app:php55 |
Unfortunately, not every parameter from ‘docker run’ command can be put inside the Dockerfile. We cannot directly link to other container or to our disk. For now, let’s just build a container and leave adding other elements for later.
Execute the docker build . to setup the container. However, this will not start the container. We will just see a message on the screen – Successfully built 4d0935622c00. The string of digits and characters is the container id which should be used to run at docker run 4d0935622c00.
To check if the container really runs we can use the docker ps command which will show us all containers running at the moment. In the last column we can find a pre-generated or a custom name. This name will be useful in further development, so please take a moment to make it meaningful.
A small tip – every container has its own IP address and this address is changed by each build. You can find the IP and more information about container with `docker inspect [name]` command which will print a list of all parameters and arguments.
The last step at this point is to change the docker-compose file to cooperate with our Dockerfile. The line with image should be replaced by build:
|
1
2 3 4 5 6 7 8 9 10 |
symfony:
build: . links: – mysql ports: – “8000:80″ volumes: – .:/var/app mysql: image: mysql:5.6 |
How to check what’s inside?
From time to time something is not working properly and the only way to solve the problem is to login to the machine and check what is happening inside. Docker delivers an option to execute a specified command in the container – docker exec.
The simplest and most useful example is the one which checks some files inside, e.g. the logs
|
1
|
docker exec container_name cat /var/logs/apache-error.log
|
This will show us the Apache’s error log directly from the container (the last parameter in the command). Everything we put after it will be executed in the container. But we will be logged out immediately after executing the command. How to stay logged in? We can use two more options – i (keep open – interactive) and t (allocate a pseudo TTY).
|
1
|
docker exec container_name -it /bin/bash
|
This command will login us to the container_name container and show the bash console. Remember, all changes probably will be lost when you will run the container again.
Summary
In the first part of the tutorial, we have learned how to setup our application with Docker, build first containers, link them together and facilitate the process. Next article will be dedicated for preparing the Docker environment for continuous deployment process with Amazon Webservices. So, stay tuned.
The top image has been downloaded from bgiormova.blogspot.com.